Extract PDF Tables to Excel with AI
A step-by-step guide to setting up an AI agent that extracts PDF tables to Excel using LLMs with human-in-the-loop review.
Ståle Zerener
Co-founder & CEO
Extracting PDF tables to Excel is a common challenge when working with invoices, purchase orders, financial statements, bank statements, or product catalogs. PDFs aren’t designed for structured data analysis, and manual copy-paste into spreadsheets is slow, error-prone, and difficult to scale. AI can help extract tables from PDFs and convert documents into clean, structured Excel data with fewer errors.
In this post, we show how to set up an AI agent that automatically extracts tables from PDFs and converts them into structured Excel spreadsheets in under 10 minutes, using LLMs with human-in-the-loop review.
If you are still deciding between spreadsheet output and API output, compare this walkthrough with converting PDFs to JSON using AI. For the model and OCR trade-offs behind table parsing, see Using LLMs for OCR and PDF Parsing.
Before we get started
You’ll need:
- A Microsoft 365 work or school account
- A Cradl AI account
Setting up your AI agent
To get started, create a new agent and choose the Custom option.
Next, upload a sample PDF (for example, a product catalog or invoice). Cradl will analyze the document and automatically generate an agent based on both the file and its contents. In the final step, leave the first integration blank and select Microsoft Excel as the last integration from the dropdown list.
Running your first PDF table extraction
When you create a custom agent using a sample document, Cradl automatically runs an initial extraction.
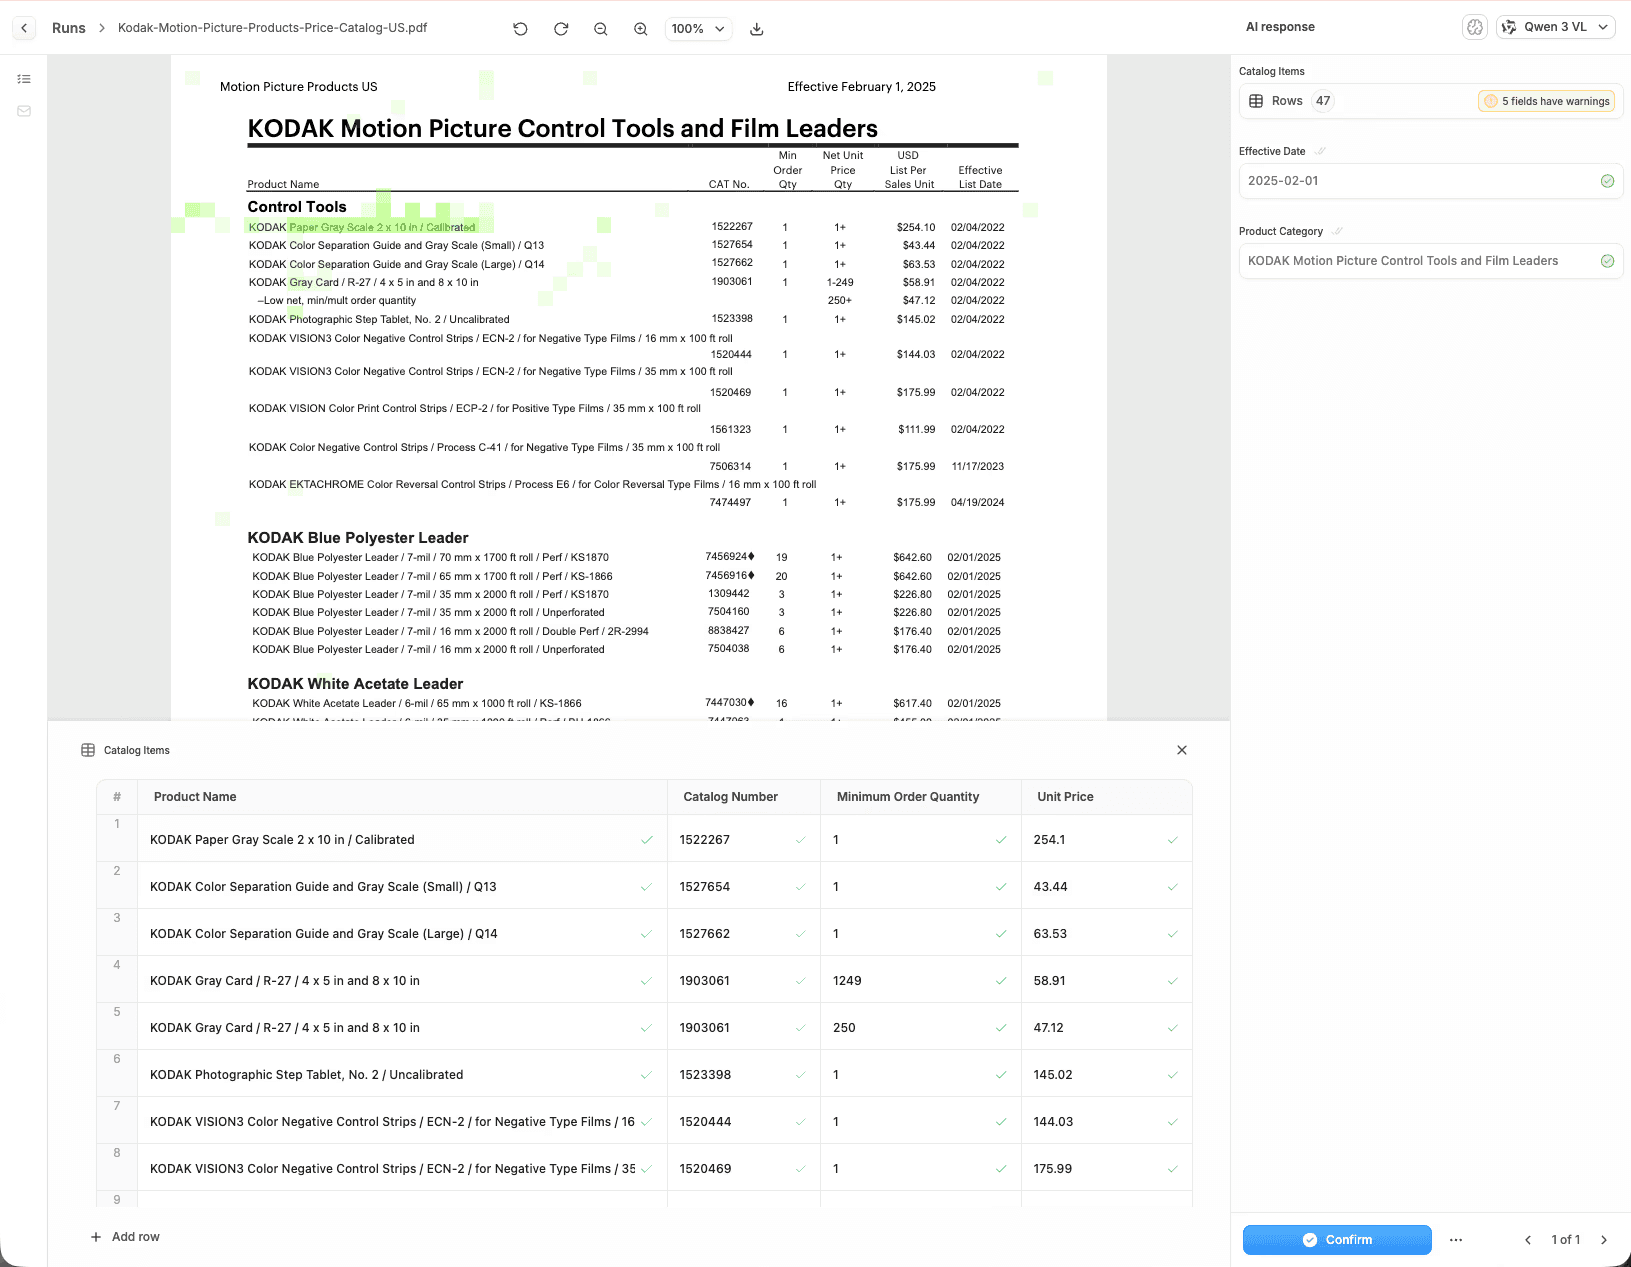
Open the Runs tab and select the processed PDF to review the results. You’ll see the extracted table data alongside the original document. Cradl will ask you to verify values that the AI is uncertain about.
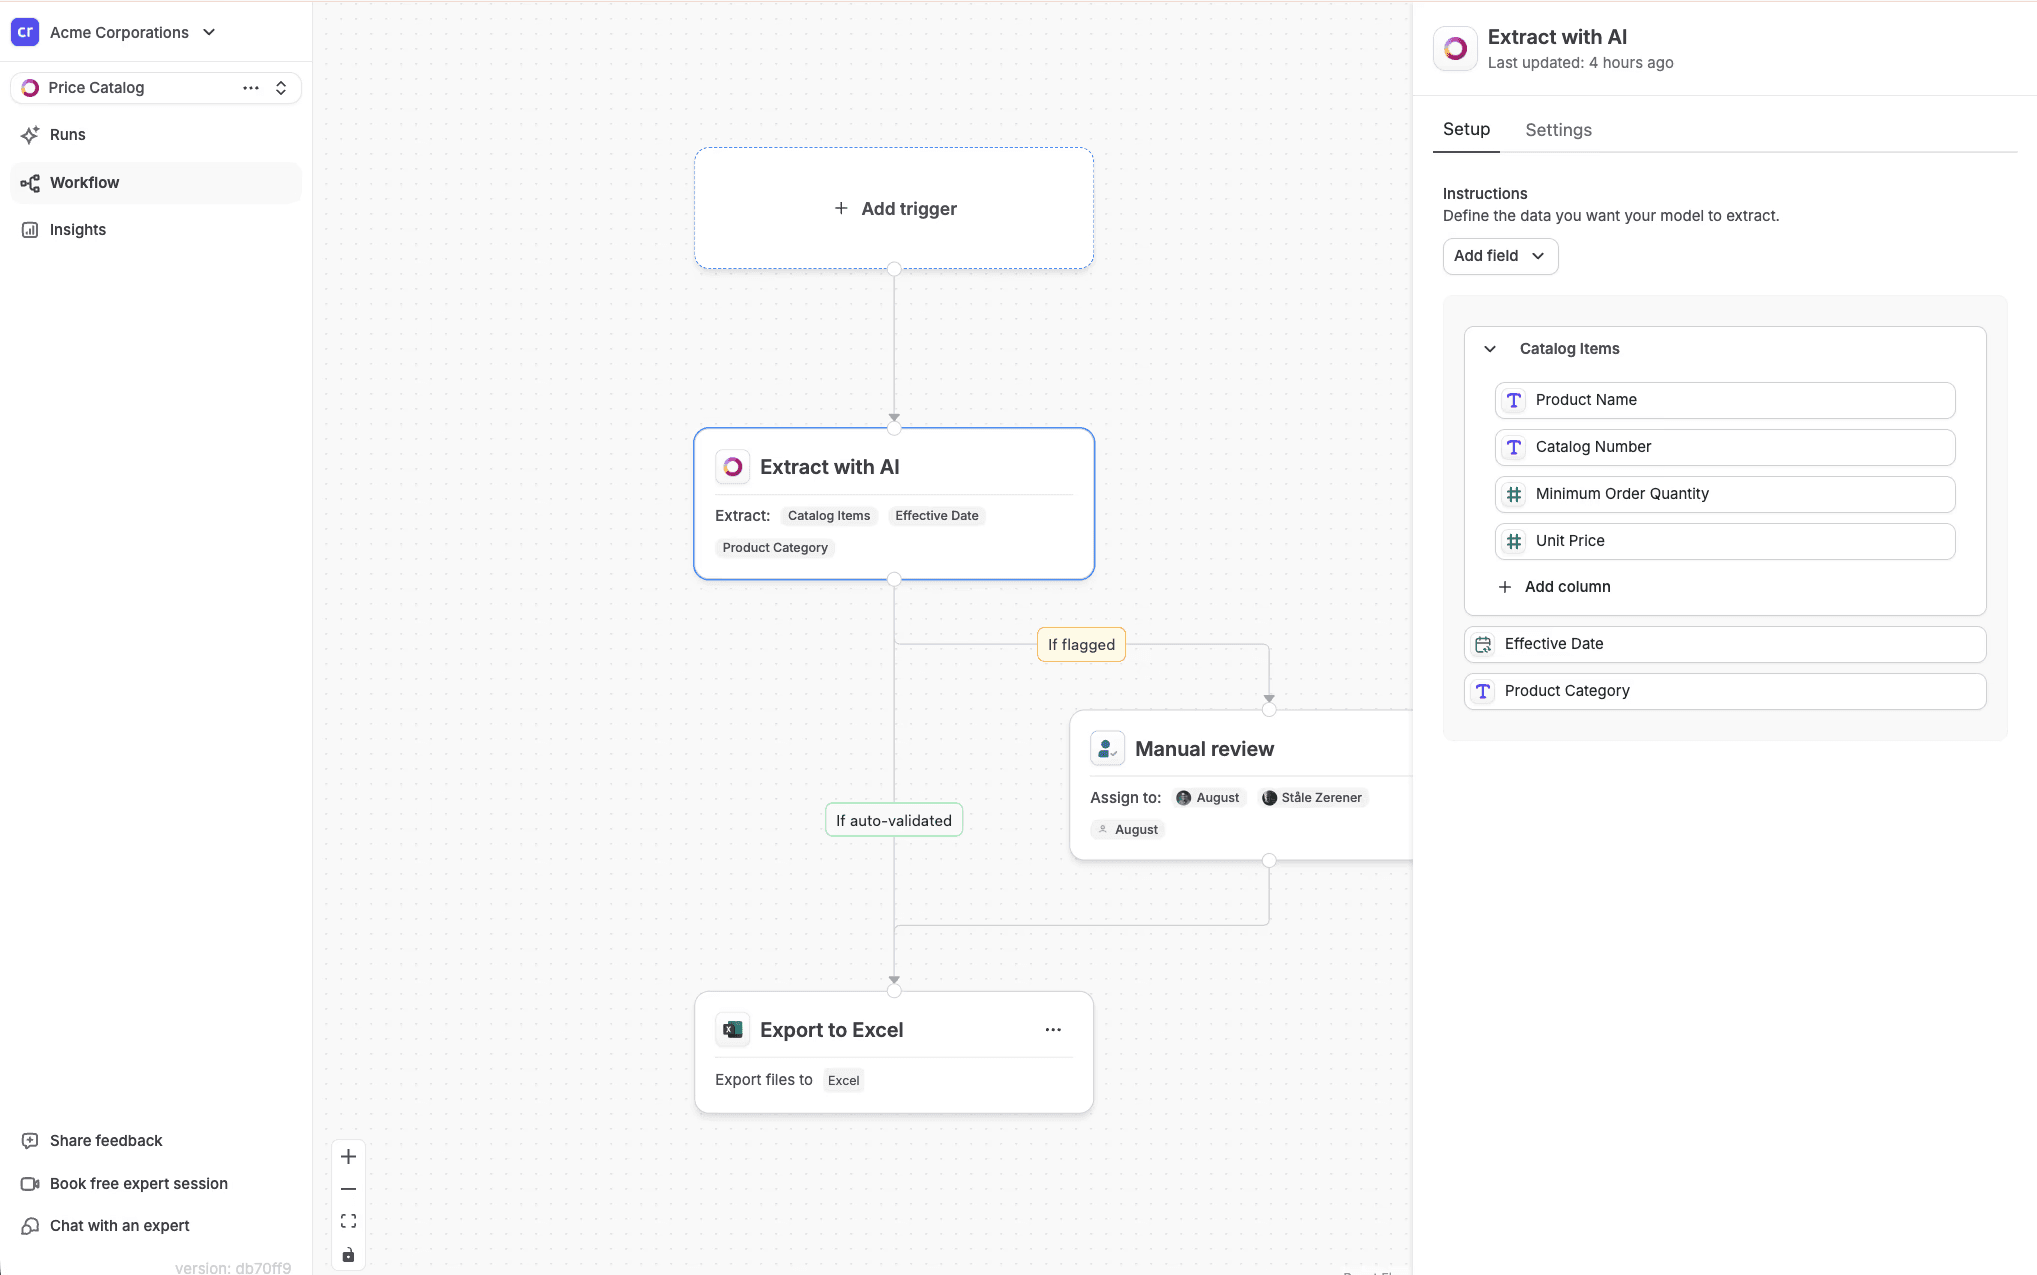
If you want to customize which fields are extracted, open the Workflow tab and select the Extract with AI node. From there, you can add, remove, or refine fields based on your needs.
Exporting the results to Excel
Once your agent is extracting data correctly, the next step is exporting it to Excel.
For a product-level overview of spreadsheet exports, see the Microsoft Excel integration. If your workflow is built in Power Automate, the Power Automate PDF-to-Excel guide covers the platform-specific setup.
Start by creating a new Excel workbook and inserting a Table (Insert → Table). This step is required so Cradl knows where to write the extracted data. Add columns that correspond to the fields your agent extracts.
Next, set up the Excel integration in Cradl. Sign in with your Microsoft account, select the workbook, choose the table you want to export to, and define how each extracted field maps to a column. The column names in Excel don’t need to match the field names in your Cradl agent—you’ll define the mapping during setup.
If you prefer to export each PDF to its own Excel file, choose Export to separate workbooks and select a destination folder instead.
Take it for a spin!
After completing the integration, you can either re-upload the document or select an existing run and click Rerun from start.
Once processing is complete, you may be prompted to confirm values the model is unsure about. You can adjust the confidence threshold for each field depending on how accurate you need it to be.
When everything looks good, click Confirm and the extracted values will appear in your Excel spreadsheet:
That’s it. No more manual copying and pasting.